-1.svg)
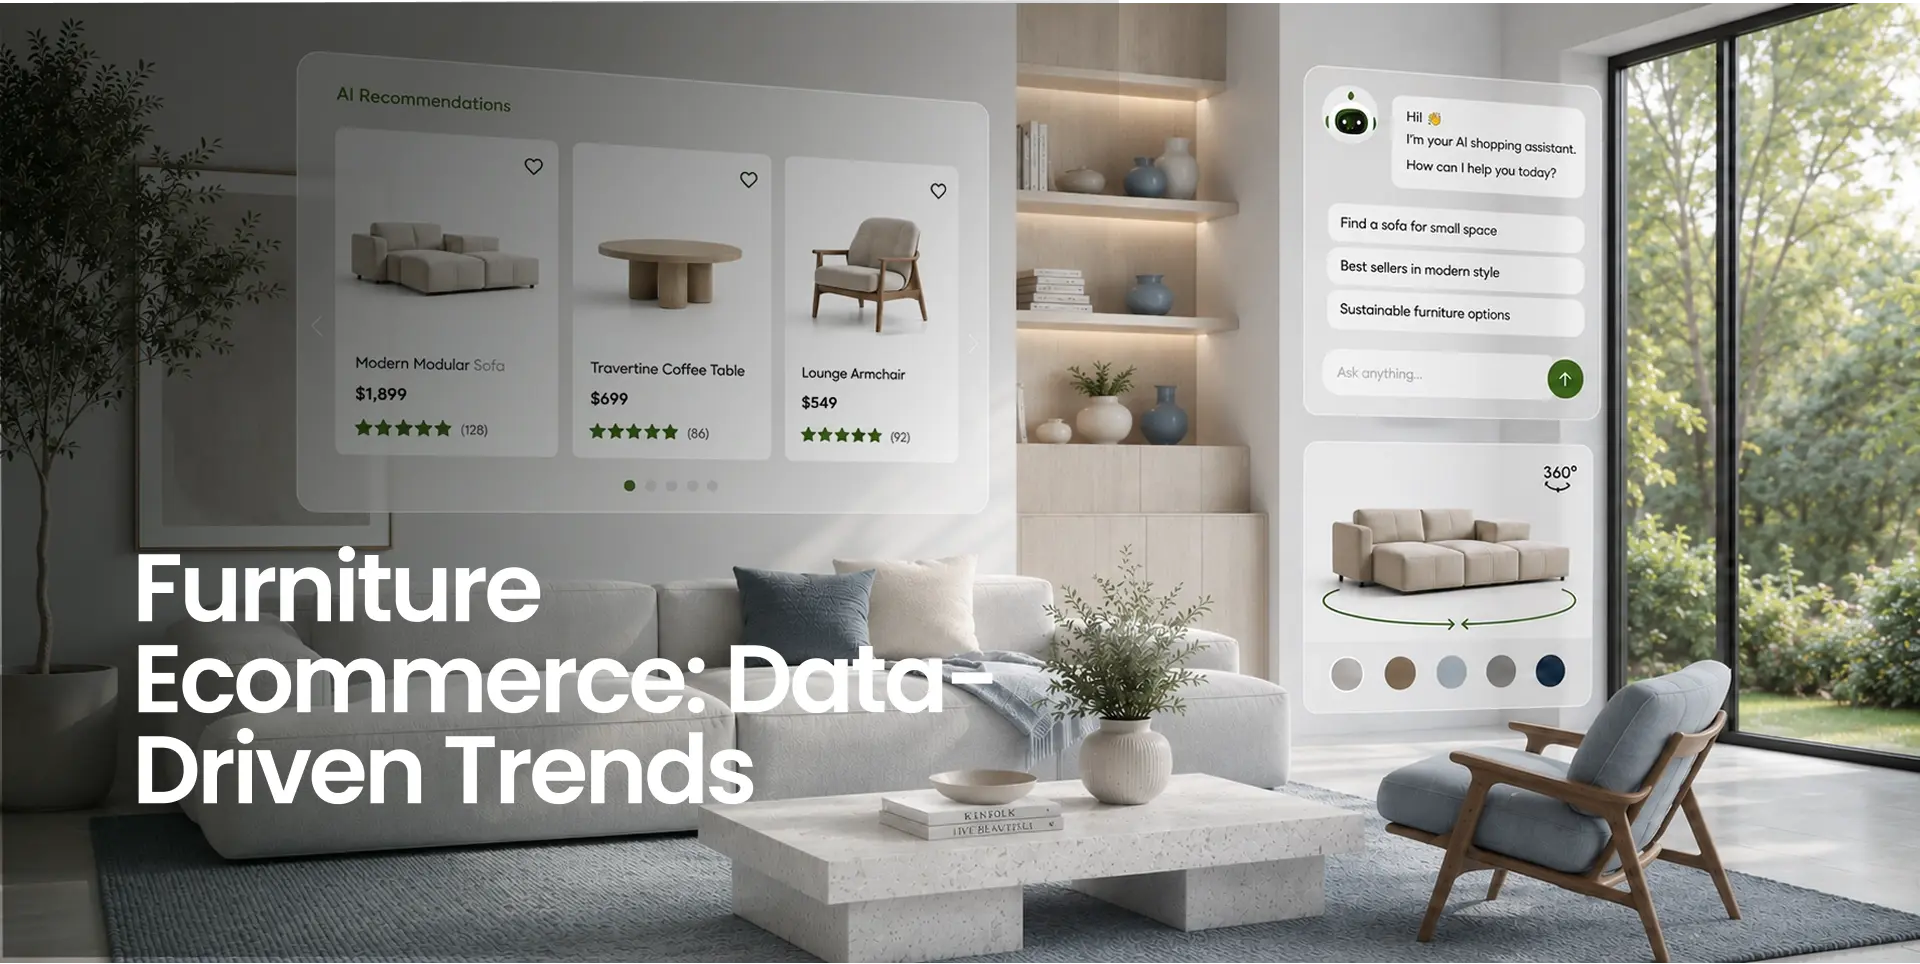
Modern customers expect control over what they buy. They want to explore and customize products before making a purchase. Static images and dropdown menus can’t deliver that. As a result, many brands face the same challenges — abandoned carts, long decision cycles, and disappointed customers when the final product doesn't match their expectations.
A 3D product configurator solves this by turning product exploration into an interactive experience. Customers can rotate and zoom 3D models, swap materials, see pricing updates in real time, and preview items in their own space with augmented reality. And it works: brands see up to 94% higher conversion rates, 28% faster sales cycles, and 40% fewer returns after implementation.
But for some businesses, ready-made SaaS solutions don’t quite fit. The product catalog might be too complex, or the desired customer journey too specific. These teams often ask: What would it take to build our own configurator?
This guide walks you through that process, showing how to plan, build, and launch a custom solution. It’s not a tutorial for developers, but a roadmap for decision-makers who want to understand what’s involved, what challenges to expect, and how to make smart trade-offs between custom builds and existing solutions.
What is 3D Product Configurator?
A 3D product configurator is an interactive online tool that allows shoppers to customize and explore products directly on your website. Unlike traditional product pages, it enables to:
- Rotate and zoom in on 3D models
- Swap colors, materials, and components
- Adjust product dimensions
- Preview items in their space using AR/ AI

As each change is made, the 3D model (a digital twin of your product) updates instantly, giving users a clear, lifelike view of their choices. Behind the scenes, a configuration rules engine ensures every combination is valid, buildable, and priced correctly.
Today, product configurators are widely used across industries — from furniture and home décor to automotive, fashion, and complex B2B equipment. Any product that comes in multiple variations or requires visualization before purchase can benefit from a configurator.
For eCommerce, it drives conversions by helping shoppers buy with confidence. For B2B and manufacturing, it streamlines complex sales workflows and quoting. In both cases, it’s a core piece of digital infrastructure that accelerates decisions and reduces manual work for your sales team.
Want a deeper breakdown? We’ve covered how product configurators work, their types, and real business use cases in detail here.
Why Build a 3D Configurator Instead of Buying?
Most teams start by exploring dedicated configurator software, and for many, this is the right choice. SaaS solutions like Zolak let you launch fast (2–6 weeks), require no engineering resources, and include essential features like rendering, logic setup, built-in CMS, and ecommerce integrations out of the box.
But sometimes, your product offerings or workflows simply don’t fit a template. You might sell highly customizable products with complex dependencies. Or maybe you want to design a unique buying journey that’s impossible to achieve with a standard interface.
In those cases, a custom development becomes worth exploring. It gives you full control over UX, logic, and integrations.
Let’s break down how to build a 3D product configurator from scratch.
Step 1: Define Goals and Use Cases
Start by defining why you need a configurator. Is it to improve conversion rates, automate quotes, or offer a better buying experience? Knowing the business outcome will guide every technical decision later.
Then, define who will use it and where. Is it for end customers in your ecommerce store, for your sales reps, or for dealers in physical showrooms? Should it work on mobile, desktop, or in-store kiosks?
Finally, set success metrics — measurable KPIs like:
- +20% online conversion rate
- 50% faster quote generation
- Reduce returns from misconfigured custom products
Careful planning and clear goals will help you stay focused and streamline the entire process.
Step 2: Map Product Logic and Configuration Rules
The success of your configurator depends on product logic — the rules that dictate how different options and features interact with each other. Begin by documenting:
- Customizable attributes (e.g., materials, colors, dimensions)
- Dependencies (e.g., certain fabrics only fit specific frames)
- Restrictions (e.g., certain combinations may not be available in inventory)
This is where the configurator “learns” how to behave like a knowledgeable salesperson. For example, in manufacturing, it should ensure that selected options align with engineering data and prevent impossible combinations. In retail, it should only offer commercially available variants.
Once rules are mapped, formalize them in a structure that your development team can use — typically a combination of product data, logic tables, and configuration trees.
Step 3: Prepare and Optimize 3D Assets
Your 3D models are the visual core of the configurator. Quality, accuracy, and performance depend on how well they’re prepared. Here’s what you need to do:
1. Convert CAD Files to Web-Ready Models
Start by preparing accurate 3D models of your products. If CAD files or technical drawings are available, convert them into web-friendly formats such as GLB or GLTF. If not, you can model from high-quality photos. Then, simplify these models to reduce complexity (polygon count) while preserving key details, and apply realistic textures and materials using Physically Based Rendering (PBR) workflows for lifelike visuals.
2. Optimize for Performance
Your configurator must load quickly and run smoothly across all devices. Focus on performance optimization with techniques like level-of-detail (LOD) settings, compressed textures, and efficient geometry.
3. Organize Assets
Structure your 3D models in a clear library. Each variant must match your configuration rules so changes happen instantly and without errors. Use consistent naming conventions and map 3D models to SKUs to avoid integration headaches.

Step 4: Design the User Experience
A great customer experience is the main conversion driver. The design of a 3D product configurator should focus on visual clarity, intuitive selection, and guided interaction.
Define the User Flow
Outline the steps users will follow, from selecting a base model to choosing materials, adding components, and reviewing the final configuration. Ensure each step is clear and easy to navigate.
Build an Intuitive Interface
Keep controls simple and visually grouped. Use real-time feedback, such as live pricing and instant visual updates, so users feel confident in their choices. Provide an option to reset or undo selections.
Optimize for Mobile
Many customers will use mobile devices, so ensure the configurator is mobile-friendly. This includes simplifying the UI for small screens, supporting touch gestures, and ensuring fast load times.

Prototype and Test
Before development, create wireframes or clickable mockups. Test the flow with real users to confirm usability and avoid adding unnecessary complexity. Early feedback ensures the configurator is both intuitive and effective.
Step 5: Choose Your Technology Stack
The technology stack is the backbone of your 3D product configurator. It defines how your system performs today and how easily it scales tomorrow.
Define the Core Technologies
Start with the 3D layer. Most modern configurators rely on WebGL-based frameworks such as Three.js or Babylon.js for real-time rendering. For teams already working with React, React Three Fiber has become a preferred option, combining 3D visualization with modern UI workflows and state management.
Around this core, several layers complete the architecture:
- Backend or API layer for pricing logic, product data, and rule validation.
- Content Management System (CMS) for managing assets, variants, and configuration logic.
- Integration framework to connect eCommerce, ERP, or CPQ (configure price quote) systems.
- Cloud hosting and CDN delivery to ensure high performance globally.
- AR support (ARKit or ARCore) if augmented reality previews are part of your roadmap.
The CMS: The Configurator’s Control Center
A strong CMS is what keeps your configurator agile after launch. It enables non-technical teams to update assets, adjust pricing, or add new variants without touching code, saving time and development resources.
A good CMS should handle:
- Product attributes, dependencies, and logic rules
- Asset uploads and versioning for 3D models and textures
- Pricing and SKU mapping for accurate configuration
- Role-based access control
.webp?width=1957&height=1371&name=cover_3%20variant%20(4).webp)
Deployment Considerations
Finally, decide where your configurator will live. You can embed it in your website, launch it as a standalone web app, or build it into a mobile experience. Choose the setup that best fits your buying journey and internal capabilities.
Step 6: Develop and Integrate
Once your assets, logic, and design are ready, it’s time to bring everything together.
Frontend and Backend
The frontend powers the visuals: rendering 3D models, managing interactions, and displaying live updates. The backend runs the rules engine, pricing information, and integrations. Seamless communication between the two is key to creating a fast and reliable experience.
System Integrations
A 3D configurator typically connects with:
- eCommerce platforms (Shopify, Magento, WooCommerce) for checkout and analytics.
- ERP or PIM systems for real-time inventory, pricing, and catalog management.
- CRM or CPQ tools for quote generation, lead tracking, or sales process automation.
- Analytics systems for tracking user preferences and conversion metrics.
Security and Performance
Build security and performance into the process, not as an afterthought. Protect APIs, validate inputs, and optimize loading so the experience stays smooth across devices. Continuous tuning of assets and caching helps maintain long-term stability.
Step 7: Test, Launch, and Optimize
When development is complete, testing and optimization ensure everything works exactly as intended — for both users and internal teams.
Testing Before Launch
Thorough testing prevents costly fixes later. Focus on:
- Functional testing: Validate all configuration rules, pricing logic, and dependencies.
- UX testing: Ensure navigation and interaction feel intuitive across devices.
- Performance testing: Confirm fast load times and smooth rendering under various network conditions.
A soft launch or limited rollout lets you collect real feedback and identify friction points before scaling globally.
Launch and Continuous Optimization
After launch, the work doesn’t stop. Use analytics to monitor how users interact with your configurator:
- Track completion rates and drop-offs
- Measure time spent per configuration
- Identify which options or paths are most engaging
Iterate continuously. Even small changes, like faster loading, clearer steps, or better default angles, can significantly boost engagement and conversions.
The Real Cost of Building 3D Configurator From Scratch
On paper, building a 3D configurator might look straightforward. In reality, it requires a rare blend of skills that few teams have fully in-house. 3D artists, frontend developers, backend engineers, UX designers, and DevOps specialists must work in perfect sync to bring the system to life.
Full Ownership = Full Responsibility
Building from scratch gives you complete control over every aspect of the configurator, from smooth integrations to ongoing updates and fixes.
While this level of control allows for a highly customized solution tailored to your business needs and customer preferences, it also means assuming full responsibility for long-term maintenance and support. This can be a resource-intensive and time-consuming process, particularly for companies that need a unique and evolving solution.
Costs & Time Estimates
For a basic Minimum Viable Product (MVP), the cost typically ranges from $350K–$525K and 2,000–3,000 development hours.
For a full-featured, production-ready configurator, expect to spend $350K–$1M+ and 3,000–6,000 hours (source: Kickflip). This estimate doesn’t include ongoing operational costs and maintenance, which can add up quickly.
Ongoing Maintenance
And the work doesn’t stop at launch. Updating catalogs, adding variants, and refining materials all require continuous development and quality assurance. Security, performance, and scalability must also evolve with the product. The larger the catalog, the greater the demand for automation, testing, and cloud optimization.
Choosing Your Build Strategy
At this point, you face a strategic decision: should you build the configurator entirely from scratch, extend an open-source engine, or use a dedicated platform?
1. Ready-to-Use SaaS Configurators
SaaS solutions are the fastest and most cost-efficient way to launch. They provide hosting, rendering, seamless integrations, and analytics out of the box for a subscription fee.
Pros:
- Fastest time-to-market: 2–6 weeks
- Minimal internal resources needed
- Ideal for standard product journeys: colors, materials, finishes, accessories
- Predictable pricing based on usage (e.g. Zolak Configurator from $50/month)
Best for: Perfect solution for eCommerce brands launching or testing customizable product lines.
Examples: Zolak, Cylindo, VividWorks.
2. Fully Custom Build
A custom configurator gives you full control over UX, business logic, integrations, and data ownership.
Pros:
- 100% tailored to your product and workflows
- Complete control over data and security
Cons:
- Significant investment: $350K–$1M+
- Timeline: 6–12+ months
- Requires full internal or dedicated engineering team
- Ongoing maintenance, performance tuning, and updates are fully your responsibility
Best for: Enterprises with complex or mission-critical workflows that off-the-shelf SaaS can’t support.
3. Hybrid / Engine-Based Approach
A hybrid approach blends the best of both worlds — custom functionality built on top of an existing 3D visualization engine or 3D CMS. This allows you to retain full flexibility where it matters, such as custom logic, UI, or integrations, while significantly reducing the time and effort needed for core infrastructure like rendering, asset management, and hosting.
The cost of this approach is typically 50–60% lower than building from scratch, depending on the scope of your project. Development timelines are also much shorter, often cutting the process down by several months.
Zolak Engine: Reuse, Don’t Reinvent
Why start from scratch when you can leverage a proven 3D engine to power your product configurator?
Zolak offers the core technology you need to build a high-performing 3D configurator. With our comprehensive toolkit, you can focus on what truly matters — the user experience and your business logic, while we handle the heavy lifting behind the scenes.
Do I Need an In-House Engineering Team?
A common concern for businesses is whether they can launch a configurator without a dedicated internal dev team. The short answer is yes.
Modern platforms like Zolak are designed with a "no-code/low-code" philosophy. You don’t need to build core engine logic from scratch or maintain complex server infrastructure. By using a ready-made SDK and an intuitive CMS, your marketing or content team can manage the product updates and visual logic, while the platform provider handles the heavy technical lifting. This allows you to focus on the customer journey rather than the underlying code.
How It Works
Zolak provides the essential building blocks for your future configurator:
- Core 3D Engine: Delivering high-quality, real-time 3D visualization.
- CDN Delivery: Ensuring fast, reliable content delivery globally.
- AR/AI Modules: Integrated augmented reality and artificial intelligence to enhance user interaction and product customization.
- CMS: Effortlessly manage assets, product data, and configurations.
Once these core components are in place, your team (or ours) can focus on implementing product-specific rules, creating integrations, and designing a custom user interface that aligns with your brand and user experience goals.
We also provide APIs that make it easy to connect with your internal systems: synchronize product data and pricing, send configurations and orders directly to your ERP, generate quotes and Bills of Materials automatically.
Key Benefits
- Cost savings: Save up to 50–60% in development and ongoing maintenance compared to building from scratch.
- Speed: Launch in 2–4 months instead of 6–12+ months.
- Reduced engineering burden: Maintenance, security, and hosting are handled by Zolak.
- Flexibility: Fully customizable UI, workflows, and business logic on top of a proven core system.
- Scalability: Effortlessly scale across SKUs and product lines without rebuilding the infrastructure.
Every implementation has its own set of creative requirements. Zolak gives you the flexibility to meet them without rebuilding the entire stack.
To power a configurator, your product catalog is already digitized in 3D. Those same 3D models can be used to generate unlimited visuals — silo shots and lifestyle scenes That’s exactly what 3D product rendering services unlock: scalable, photoreal imagery without costly photoshoots.
Conclusion
A 3D product configurator can transform how customers interact with your products, boosting engagement, sales efficiency, and brand trust. However, it's a complex system that integrates deeply with your digital stack, from product data to fulfillment.
Building from scratch is possible, but rarely the fastest or most efficient route. The smart move is to balance customization with proven technology — using ready engines and CMS systems to focus your efforts on what makes your brand unique.
If you’re at the point of defining your next step — whether to buy, build, or blend — the best move is to talk to experts who have done it before.
At Zolak, we understand the intricacies of creating 3D configurators inside and out. Our engine is designed to address these complexities while ensuring the best user experience and business results.
If you're ready to take the next step, let’s have a conversation. We’ll help you avoid common pitfalls and save valuable time by guiding you toward the right solution from day one.
Book a Demo with the Zolak team today.
.webp)